This is an incredibly long blog post that shows how to link a Facebook Page to Twitter, and a WordPress Blog to a Facebook Page so that when you update your blog, it automatically updates your Facebook Page and your Twitter account.
I had to do something similar for a client and decided it was cool enough to want to do a blog post about how to do this.
This took a lot of experimenting to because there are so many different WordPress plugins and options to connect WordPress to Facebook or Twitter. Honestly, I think this is probably the easiest way. Here are the requirements that I followed:
- Easy to learn and use, neither I nor my clients have lots of time to invest.
- Automatically update a Facebook Page and Twitter from WordPress
- Not update my personal Facebook profile, just my Facebook Page.
Seems simple enough, right? It wasn’t. I think because of the number of plugins and options available.
So, here’s what I did, with what I hope are fairly simple screenshots and steps to help those of you along inclined to do this. Of course, if you want some professional help, feel free to contact or call me (801-274-8490 is the office line ;-).
These instructions are for linking a Facebook Page to Twitter, and then a blog to your Facebook Page. They are more oriented for a small business owner than for a personal blog. If you don’t have a Facebook Page, and you want one, check out the post on creating a Facebook Page.
First, get your Facebook Page talking to Twitter
This was pretty easy. There’s a Twitter application that Facebook put together to link a Facebook Page to Twitter. It does not work to link a personal profile (you have to add it to a Facebook Page).
So first, log into Facebook and open your Facebook Page (note that if you want your personal profile to talk to Twitter, you can add this application to your personal profile. These steps add it to your page.)
Log in to Facebook.
Make sure you have, or create a Facebook Page
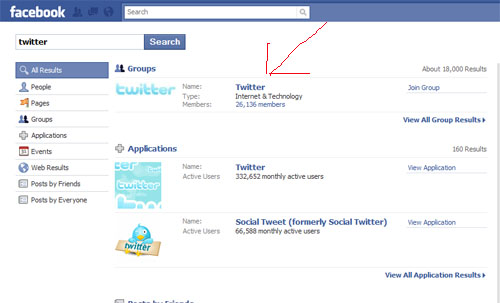
In the search bar up top, enter “Twitter”
The first link that comes up should be an application, click on it
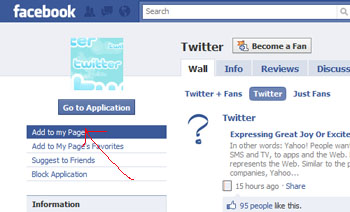
Selecting the Twitter Facebook App will open the Twitter application page and you’ll have to select on the left side to add the app to your page.
A web pop-up will open showing a list of pages in your Facebook account. Click “Add to Page” for each page you want to send its wall updates to Twitter.
Now you will need to navigate back to your Facebook Page and click on “Edit Page” in the upper left.
Under the “Applications” area if you scroll down, you should see the Twitter Application, click “Edit” under the application and if you get the page asking to Allow the application, click the Allow button.
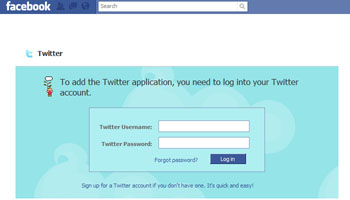
This will open up a Twitter login screen within Facebook (if everything has gone well so far):
At this point you will have to allow the Connection in Twitter. You still need to allow your page into Twitter.
Once you are logged in to Twitter, click on “Settings” and then “Connections.”
On the connections page, click on the Facebook app.
The next page will show a Facebook logo with an arrow pointing to Twitter and a large green button that says “Link a Page to Twitter”
Click on the large green button.
Again, a list of your Facebook Pages appears, with the pages on the left and a button “Link to Twitter” on the right.
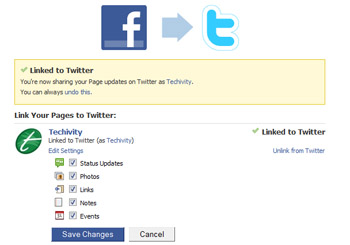
Click the “Link to Twitter” button for your page, which will open the options panel for the Twitter Facebook Application
Ok — Finally, you should be all set. Again, if this was confusing, and you want some help, don’t hesitate to contact me.
If you want to double-check, you can go into Twitter, click on “Settings” and then click on “Connections.” If you see a Facebook connection notice there, with a “remove access” option, you’ve done it.
Connect WordPress to your Facebook Page with Networked Blogs
Now that we’ve finally got your Facebook Page updating Twitter, now we can connect your WordPress Blog to your FaceBook Page, for this we are going to use the Networked Blogs Facebook App.
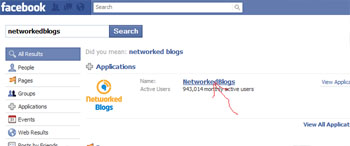
Again, go to your Facebook account and log in (or stay logged in) and in the search bar type “Networked Blogs” – the first one in the list, where it says “Applications” is what you want.
That should open the application page, and on the left, you should see a link that says “Add to my Page” click on that link to open a web pop-up with a list of your pages. Click “Add to Page” for the page you want to link to WordPress.
Now, go back to your page (click on the word “Facebook” in the upper left to go back to your home page and click “Ads and Pages” again), and click “Edit Page” on the left.
Scroll down and look at the list of Applications. Networked Blogs should be on the list.
In this case, you have to allow your blog permission to post to the wall, so click on “Application Settings” and open the “Additional Settings” tab and check the box that says “Publish recent activity to my wall.” and click “Ok”.
Now we’re going to add your blog to Networked Blogs. Click “Edit” under the NetworkedBlogs Application. If you are following along with these instructions, this is probably the first time that you are running this, so you’ll have to Allow it access; if you get a page that starts with “Allow Access” click the button that says “Allow.”
This should open the networked blogs setup page.
You will get a form to fill in with information about your WordPress Blog. Fill out the information and click “Next” – if you get an offer to check out a promotional widget, you can (and should) uncheck that box and click the next button.
NetworkedBlogs will ask if you are the author of the blog. Click “Yes” (assuming you are), now you have to go through a verification step.
Choose to verify using the widget, open another browser window, log in to your WordPress blog and open “Appearance” and “Widgets”. Put a text widget on one of your side panels.
Switch back to the networked blogs interface and from the “Copy the following HTML code” box, select everything, copy it, switch back to your blog and paste all that code into your text widget. Save the widget.
Switch on back to the Networked Blogs interface and click “Verify Widget” – if you copied the code correctly, you should see a green box indicating you are verified. Click that “Next” button to show the NetworkedBlogs configuration page.
We are ALMOST done here. ALMOST. This has been an incredibly long blog post, hasn’t it? In the future I think we’ll choose smaller topics 😉
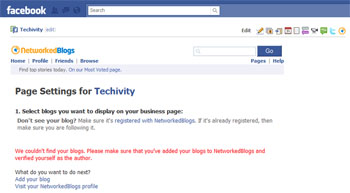
So here is the NetworkedBlogs page once you have it installed into your Facebook Account, and you’ve got a blog set up properly:
Ok, now you want to click on the right side where it says “Feed Settings” – this is the final step to syncing your blog with Facebook, and thus, with Twitter.
Once you click on “Feed Settings” you will see an interface listing all your Facebook Pages – pick everywhere you want your blog to publish its updates.
After you pick the options you want, Networked Blogs can publish a test post for you. Go for it, you’ve worked hard, publish that test post.
If it doesn’t show up, step back through and check all the settings. Feel free to post a comment here with questions or to contact me for some professional help.



Recent Comments